I never really got into working with electronics when I was younger. I always liked the idea of taking something apart and figuring out how it works, but it always ended up with a plastic bag of loose pieces and nothing learned (except how important it is to take pictures as you take something apart). After I had been working at my current job for about 2 years, one of my coworkers brought in an Arduino. He showed me how to use it, and it seemed so easy I decided to buy one myself. I got an LED to blink and it was awesome. The next day, that same coworker asked me if I wanted to build a 3d printer. I said yes. How hard could it be?
Turns out, it is way easier than you might expect. There are even full kits out there where all you need to do is put the thing together and boom you’re ready to go (after the hours and hours of calibration, of course). There are a ton of guides out there about how you can build your very own printer, so I won’t go super into detail here. Instead, I’m going to tell you how to avoid the pitfalls I fell into that made this whole process way harder than it should have been. If you want the short version of building a 3d printer, then I suggest buying the full kit above and reading this fantastic Instructable to learn all you need to know. There are a few things to note if you use the instructable with the kit:
- The extruder in the kit is an MK-8, the instructable assumes you bought a hot end and the parts to make a custom one. I highly recommend the MK-8 extruder, the other options have not performed very well in my experience. Also, the MK-8 is cheaper than quite a few hot ends by themselves.
- The Instructable mentions upgrading some parts (like the end stop mounts) which require 3d printed parts. You can either get your local maker space to print you the parts, or you will have to assemble the printer without the upgrades then print them yourself. Having done that, I will say it gives a certain amount of satisfaction.
If you want to source the parts yourself, you’re in for a treat. This task led to my first pitfalls. First, I had no idea that the Prusa i3 and the Prusa i3 Rework are completely different. So I ended up buying a complete set of parts twice, which was fun. Second, finding metric parts in the U.S. is insanely expensive. I found this handy Prusa i3 Rework buying guide which lists the conversions. If you don’t buy metric you get the joy of trying to fit the parts into 3d printed pieces designed for metric. The only real problem I ran into was the Z carriage connecting the vertical rods to the X carriage. The nut that held the vertical bar was way too big, so I just globbed some epoxy on there and it worked surprisingly well. Third, I am not a fan of buying a hot end. They are pretty expensive, and you have to assemble an extruder around it which leads to all sorts of problems. I started with Greg’s extruder which requires a hobbed bolt. I tried making my own and failed so I just bought one, and it ended up getting gummed up a ton with inconsistent extruding all the time. Instead I highly recommend the MK-8 extruder. It’s cheap and reliable. The only tricky part is getting it mounted. This will require a new 3d printed part, I’m using this mount and it works great. Fourth, DON’T SKIMP ON THE POWER SUPPLY! I had some fun times trying to figure out why my parts kept detaching from the heat bed during a print until I finally figured out only half of the bed was actually getting hot because I was using a crappy power supply. On top of that, my hot end took about 30 minutes to get to PLA printing temperature. With a proper power supply, it takes about 30 seconds. Finally, 3d printing filament has some wildly varying quality. At first I didn’t think the brand of filament I bought could ruin a print, but it absolutely can. If a print doesn’t stick to the bed you’re done, and cheap filament more often than not just peels right off. There are quite a few brands that work well, but my go to is Hatchbox. I have never had a print with hatch box filament fail unless I did something dumb.
My last bit of advice might sound obvious, but it took way too long for me to realize that calibration is insanely important. I was excited and I just wanted to print stuff, and the parts came out in vague shapes that mostly resembled what I wanted to print, so I was happy. I had no idea my “home made” printer could print well if I just took some time to really learn about calibrating it. The biggest change in quality came when I reduced the travel speed using my G-code editor. These printers are capable of printing at ridiculous speeds, but mine always turned out looking awful at full speed. I’m willing to wait a little longer to ensure some good quality prints. Take your time with calibration, print out some of the many calibration models on Thingiverse to see the limits of your printer. It really helps to know things like if your printer can handle bridges, if you should use rafts and/or supports, what is your optimal layer height, etc.
If you want to get fancy, then I recommend getting a server setup with Octoprint. My 3d printer is setup in my office, and anybody in the office can use it if they want. Octoprint is a super useful way of allowing other people to print on your machine. If you don’t want that, it also offers the super useful webcam streaming functionality so you can watch your printer from anywhere.
Finally because I’m proud of it, here is my printer:
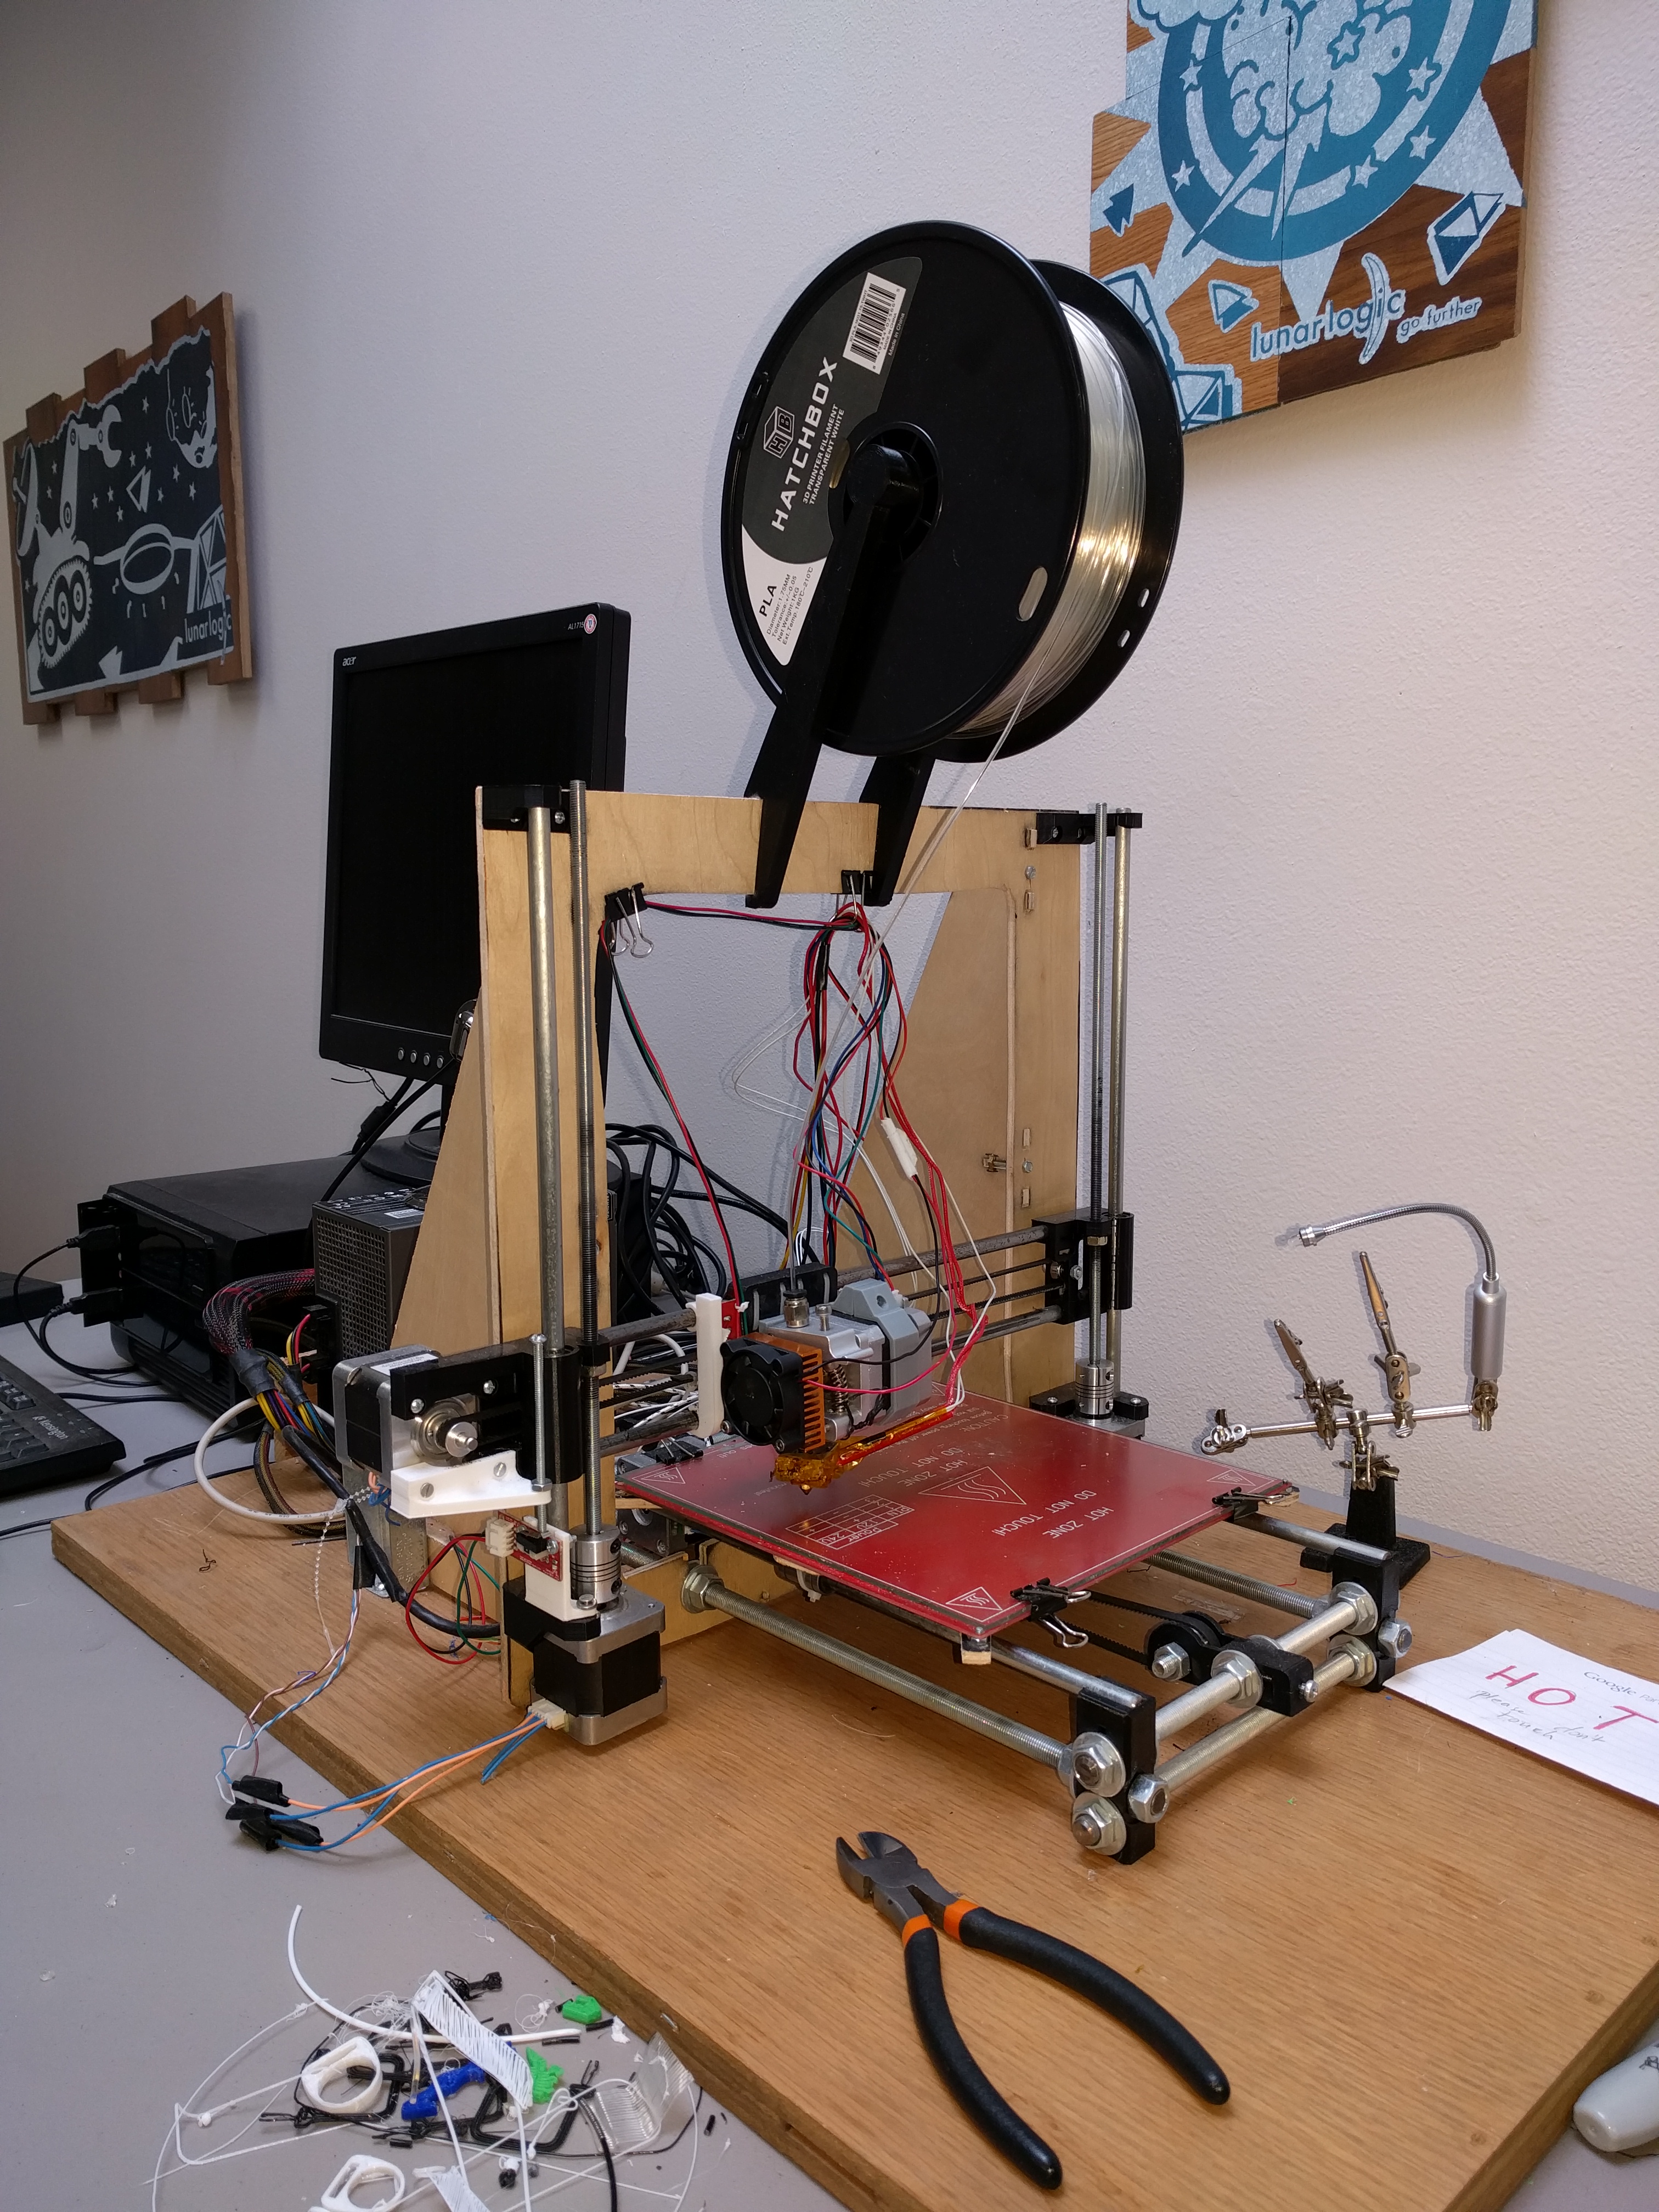
It isn’t super pretty (it is also bolted into that wooden board it is sitting on),
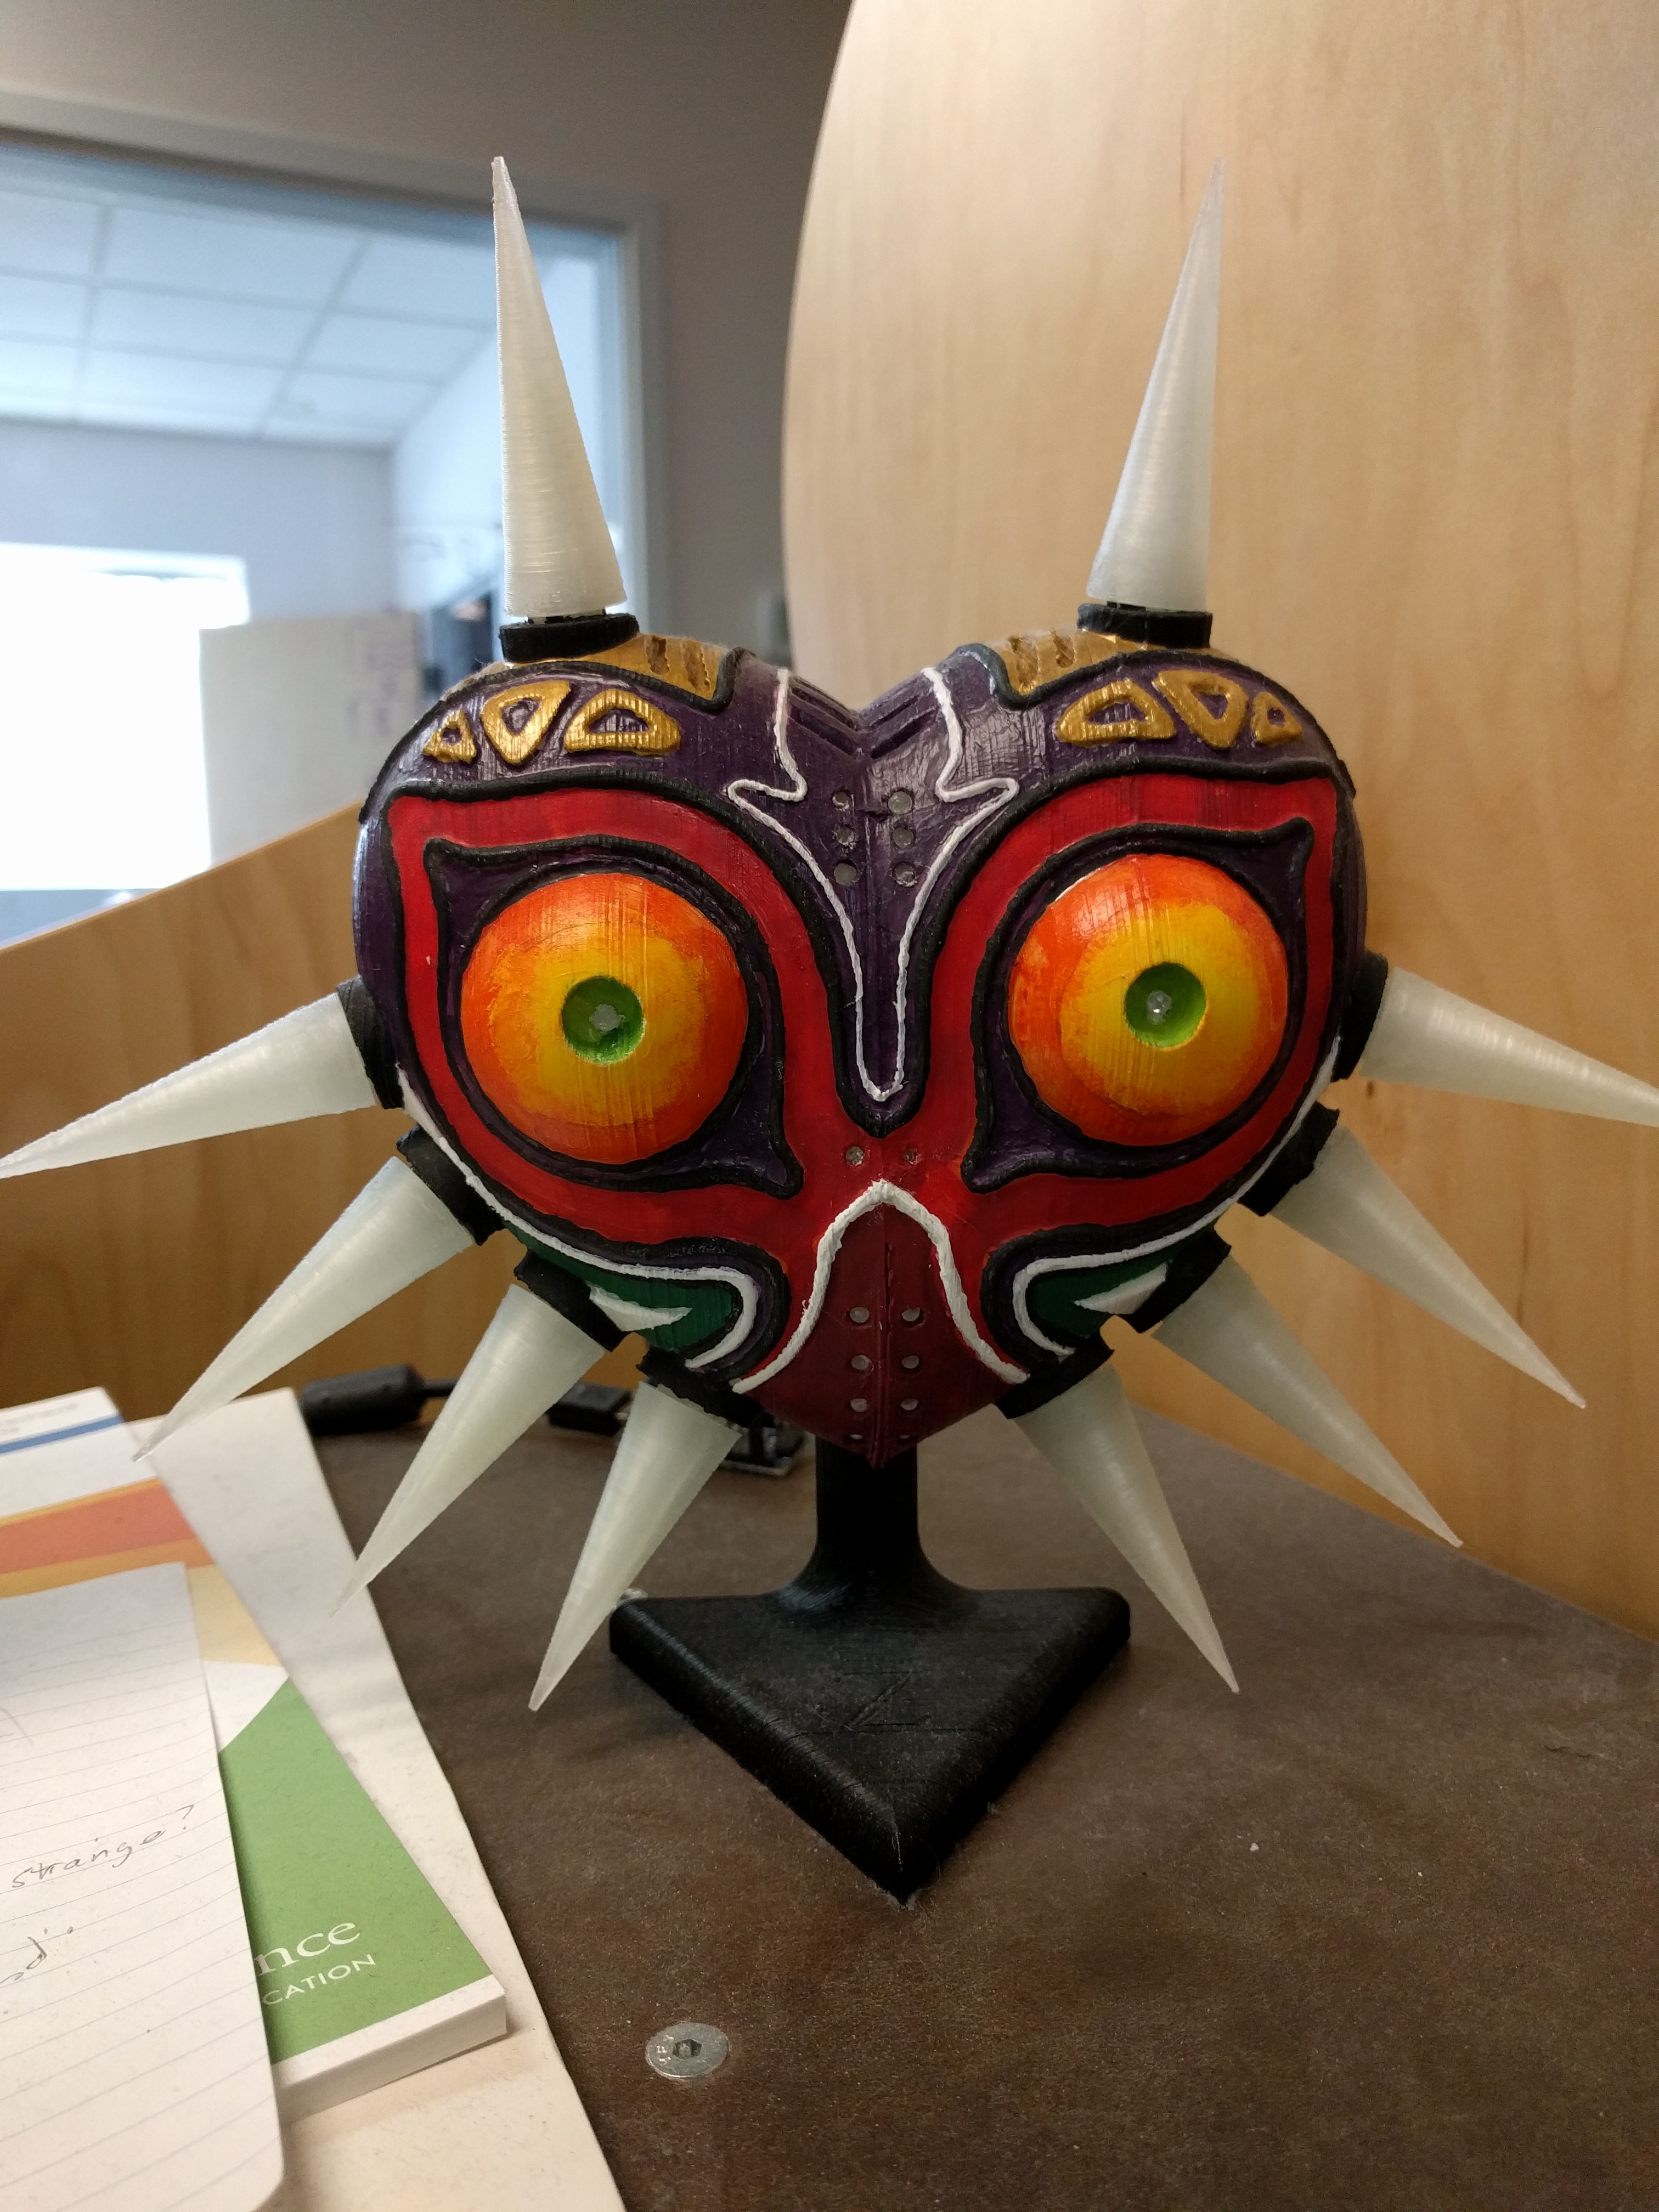
but it has been running like a champ for over 2 years. It prints pretty well too, here
is one of my favorite prints (after painting and touchups):